Hello Earthlings! Alrighty, down to business. The first prop that I decided to construct is Captain America's Shield. (https://www.flickr.com/photos/popculturegeek/5830556011/). Not my shield, not yet anyway.
My Mentor, Mr. Whittington, and I decided, after some thought, to use an old fire pit that my family didn't need anymore. Sadly I lost about twenty pictures when my computer crashed and we had to re-install everything and I lost everything. :-( Oh well, things happen, So apologize in advance for the lack of pictures from the beginning of shield, I was able to salvage the picture of me in my last post and a picture of the shield after we primed it, but everything in between was lost. Here's the step by step process, part one.
Step one: We cut the lip off the fire pit. There was a sizable two to three inch lip around the entire pit. We used a grinder, by we, I mean Mr. Whittington showed me how to use it properly and cut part of the shield for me to see then allowed me to try, I wasn't fond of all the sparks and noise so he took over again.
Step two: I sanded down the edges of the shield with sandpaper my Mentor was kind enough to share. I learned something new about sandpaper, with sandpaper, for those who don't know either, the higher the grit the finer the sand. So I started out with a 50 grit sandpaper, then moved up to a 150, then 220, then ended with a 1000 grit. It's still sharp but less edge and more dull.
Step three: I rinsed the shield with a garden hose to rid it of all the metal shaving from grinding and sanding.
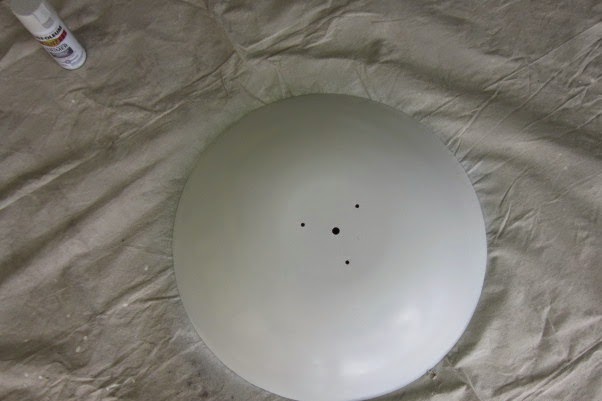
Step four: We primed the shield with a spray paint primer Mr. Whittington had brought with him. Here lies the primed shield. I apologize for the angle of the picture, I am a short person trying to take a picture of large fire pit from a bird's eye view.
After a few days Mr. Whittington and I met again and bought the necessary supplies to paint the red stripes. I bought an automotive spray paint to use on the shield, Dupli-Color, I bought red, blue and silver. We also purchased two kinds of stripping pads, a tougher one and a duller one. Now this next step I'm pretty sure none of you will have to do.
Step five: In order to line the shield perfectly you must find the absolute center of the shield. Now if you see there are four holes in my shield that look to be the center. That's what Mr. Whittington and I assumed as well. But that bigger hole right in the center is just an eighth of an inch off causing our lines to go haywire. So we screwed a piece of wood that I had lying around the garage to the inside and measured the width of the shield. My shield is 29 and 1/4 of an inch wide. We marked the center point on the wood and put a screw through it. We measured out even stripes, the center blue circle was 9 and 1/4 inches in diameter, and each stripe was 3 and 3/8 of an inch on each side.

We tied a piece of twine to the screw then to a pencil and circled the shield, creating the lines for the stripes.

Now because I forgot a key detail in Cap's shield, we had to go back and take the stronger of the two stripping pads, attach a belt to the screw in the center and circle the shield in order to achieve the grooves that Captain America's shield has. Thankfully the graphite was durable enough to stick through to the end and we didn't have to reline.
Step six: We taped off the center circle and middle stripe. Deciding to paint red considering red has the most surface cover. Then using an Exacto-Knife we cut the tape into perfect circles along the lines.
Step seven: Last but not least in part one. The painting! The most exciting part! Mr Whittington showed me how to properly spray paint rounded metal and then allowed me to continue. After the first coat dried we realized we'd need another coat considering the red looked more orange than red. Rest assured we waited a few days before painting the second coat.
Coat one.

Coat two.
Good night Earthlings! I'll be back soon!


